How to Install Microsoft Core Fonts in Ubuntu
Installing the Microsoft Core Fonts in Ubuntu is easy and only takes a few minutes. These fonts are essential for users who want to view websites with complex typography correctly. The process of installing these fonts is the same as it would be on any other Linux distribution, but there’s one little caveat: you need to install them from repositories outside of those provided by Ubuntu.
How to install Microsoft fonts in
– Open up a terminal.
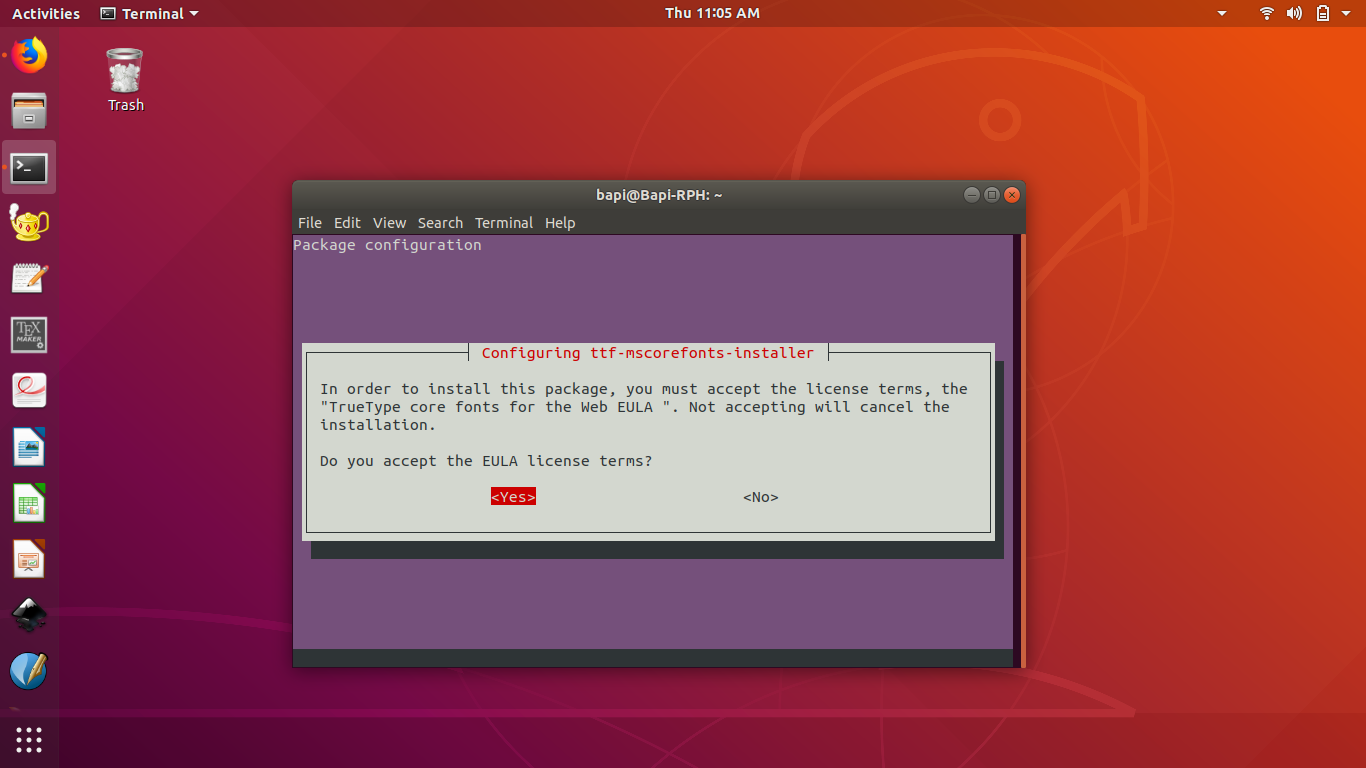
– Type in sudo apt install ttf-mscorefonts-installer and hit enter to begin the installation process. If you’re prompted for your password, type it in and press Enter again. The installer will ask if you want to continue installing the fonts – type Y or Yes then press enter once more. When that’s finished, reboot your system (you can do this from within Unity Dash by searching for “reboot”). After rebooting, go ahead and open up LibreOffice Writer so we can verify everything is working as intended!
How to update fonts cache files
After downloading the ttf files, open up Terminal and cd into your Downloads directory. Run sudo cp -r * /usr/share/fonts (this will copy all of them) then close Terminal. If you’re running Gnome Shell or Unity , restart your computer to load the new fonts; if not, enter fc-cache -v to update font cache files for applications that support it natively (such as LibreOffice). Once you’ve done that, go ahead and try out a few programs with the newly installed fonts! There are some issues installing these particular sets of core fonts on Linux though: “The mscorefonts package is designed to work on systems supporting the TrueType core fonts specification. The msttcorefonts package is designed for modern Microsoft Windows platforms that provide support for the DirectWrite API, which allows rendering of OpenType and TrueType font formats using hardware acceleration; currently these include Windows Vista and later releases in both 32-bit and 64-bit variants.”
The next sentence should be: You can do this by opening up Terminal , entering sudo apt install mscorefonts (this will download all dependencies) , then continuing with sudo cp -r * /usr/share/fonts . After restarting your computer or if you’re running Gnome Shell or Unity enter fc-cache -v to update font cache files. There are no numbers or bullet points in this sentence.
How to confirm new fonts installation
To confirm that this has worked: Open up a Word document and select ‘Properties’ from the top menu. You should see “Lucida Console”, “Arial Unicode MS” or something similar listed as your default font (this will vary depending on which fonts you have installed). If not, reboot your computer and try again – if it still isn’t working make sure the .TTF files are located in /usr/share/fonts/.